Java에서 버블 정렬 알고리즘을 사용하여 수동 연결 목록 정렬

버블 정렬은 데이터 수집을 정렬하는 데 사용되는 가장 일반적인 데이터 구조 알고리즘입니다. 인접 요소가 정확할 때까지 잘못된 순서로 반복하고 교체하여 작동합니다.
먼저 기본적인 정렬 데모를 보여드리겠습니다. 그런 다음 Java에서 연결 목록을 정렬하기 위해 두 가지 버블 정렬 알고리즘을 구현합니다.
Java의 버블 정렬
정렬의 산술적 측면에 빠지지 않고 필수 사항을 유지합시다. 버블 정렬에서 처음부터 최종 색인까지 배열을 탐색합니다.
그러면 현재 색인을 다음 색인과 비교할 수 있습니다. 이 공식의 핵심 개념은 현재 요소가 다음 요소보다 크기가 커질 때입니다.
통사론:
for (int A = 0; A < sort - 1; A++)
  for (int B = 0; B < sort - A - 1; B++)
    if (DEMO[B] > DEMO[B + 1]) {
      // Swapping of array
      int temp = DEMO[B];
      DEMO[B] = DEMO[B + 1];
      DEMO[B + 1] = temp;
    }
이제 Java에서 간단한 버블 정렬 알고리즘을 실행해 보겠습니다. 그러나 먼저 배열의 정렬되지 않은 인덱스의 초기 상태를 살펴보십시오.
배열: {43, 65, 21, 64, 12, 6, 1}
다음 코드 블록은 이 기본 정렬 알고리즘을 적용하여 이 배열 인덱스에 대해 버블 정렬을 수행합니다.
요구 사항에 따라 이 공식을 항상 수정할 수 있습니다. 그러나 핵심은 이 순간에 명확성을 형성하기 위해 기본적으로 남아 있어야 합니다.
암호:
// In this program, we will sort an array DEMO using the bubble sort algorithm
// Main class
public class BubbleSortLinkListExample1 {
  // Main function
  private void bubbleSort(int DEMO[]) {
    // Using .length to determine entire length of array's index
    int sort = DEMO.length;
    // If array's length is less than int sort, increase it by 1
    for (int A = 0; A < sort - 1; A++)
      // Formula 1
      for (int B = 0; B < sort - A - 1; B++)
        if (DEMO[B] > DEMO[B + 1]) {
          // Swapping of array
          int temp = DEMO[B];
          DEMO[B] = DEMO[B + 1];
          DEMO[B + 1] = temp;
        }
  }
  /* Now we are going to print DEMO array*/
  void printArray(int DEMO[]) {
    int sort = DEMO.length;
    for (int A = 0; A < sort; ++A) System.out.print(DEMO[A] + " ");
    System.out.println();
  }
  // We are going to implement a driver algorithm for sorting our DEMO array
  public static void main(String args[]) {
    BubbleSortLinkListExample1 ob = new BubbleSortLinkListExample1();
    int DEMO[] = {43, 65, 21, 64, 12, 6, 1};
    ob.bubbleSort(DEMO);
    System.out.println("After the array has been sorted!");
    ob.printArray(DEMO);
  }
}
이 배열을 오름차순으로 정렬한 후 Java의 출력을 얻습니다.
출력:
After the array has been sorted!
1 6 12 21 43 64 65
Java의 버블 정렬 수동 연결 목록
연결 목록 수동 정렬도 버블 정렬의 간단한 방법입니다.
이전에 데이터 탐색에 대해 논의한 적이 있습니까? 이제 실천해 보겠습니다.
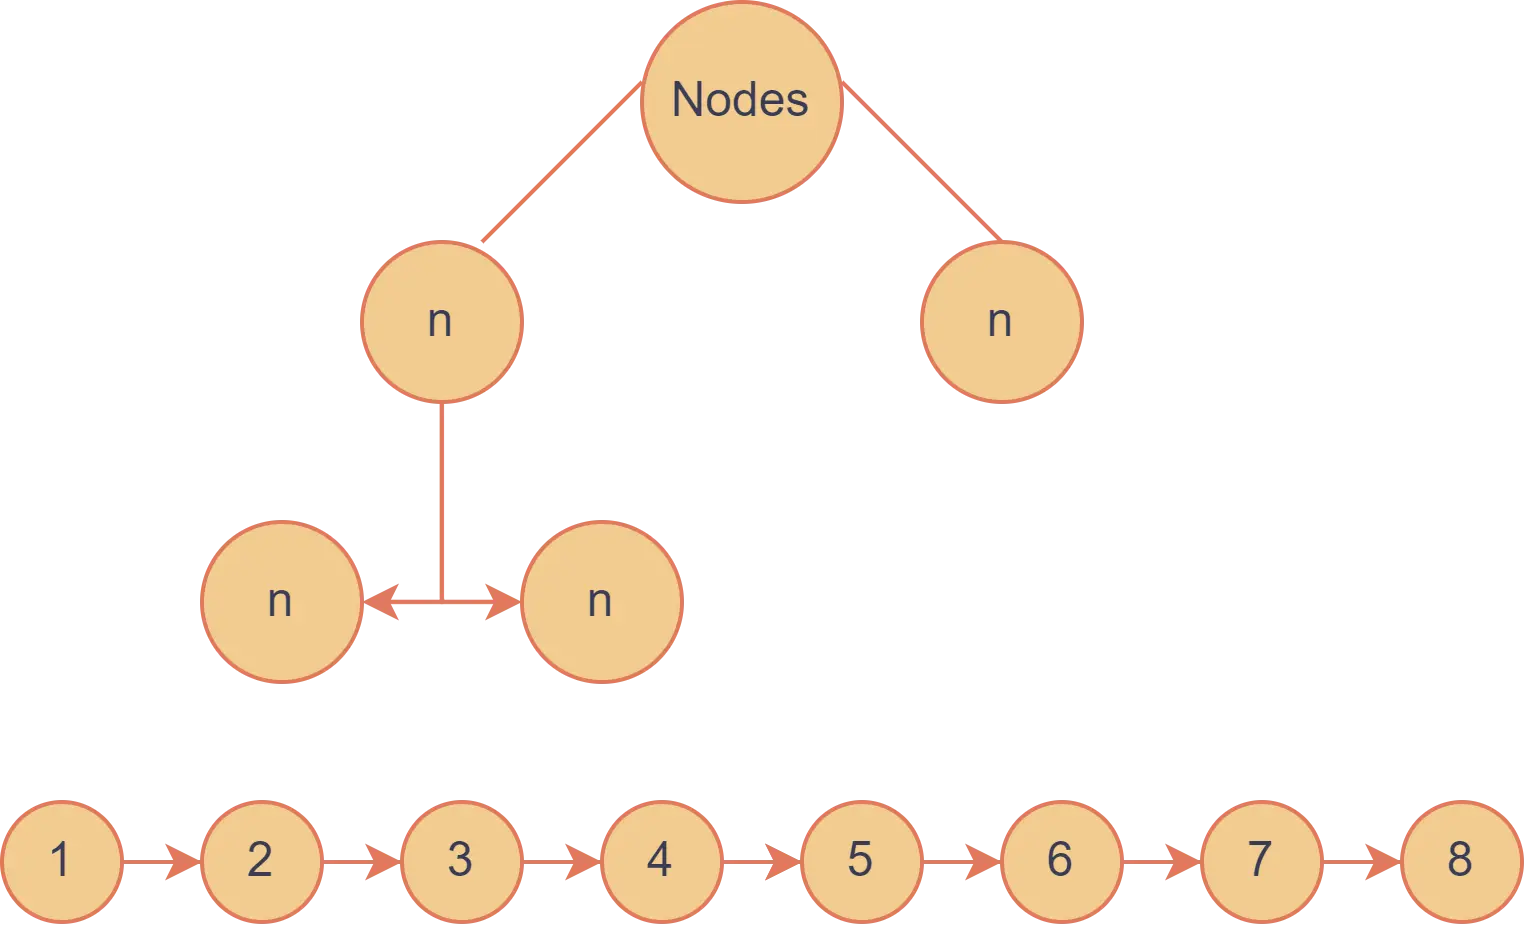
노드를 사용하면 한 노드에서 다음 노드로 데이터를 이동할 수 있습니다.
아래 데모 모델을 살펴보십시오. 이전 예제에서 정렬을 수행했으므로 여기서 노드를 강조하는 것이 중요합니다.

Java의 클래스 정렬 연결 목록
이해했듯이 이 클래스를 적용하여 Java에서 노드를 형성합니다.
암호:
class SortLL {
  public static class Mynode {
    int indx;
    Mynode fwdMynode;

    public Mynode(int indx) {
      this.indx = indx;
      this.fwdMynode = null;
    }
    public int getindx() {
      return this.indx;
    }
  }
.setNextNode() 함수도 사용할 것입니다.이러한 클래스를 별도로 사용하고 해당 개체를 호출할 수 있지만 이는 길고 복잡한 방법입니다. 따라서 모든 클래스를 하나의 파일에 보관했습니다.
마찬가지로 .getNextNode() 함수를 사용하여 인수 없이 다음 클래스 요소를 검색합니다. 개념에 익숙해야하므로 더 이상 고민하지 않고 수동 버블 정렬 알고리즘을 실행해 보겠습니다.
-
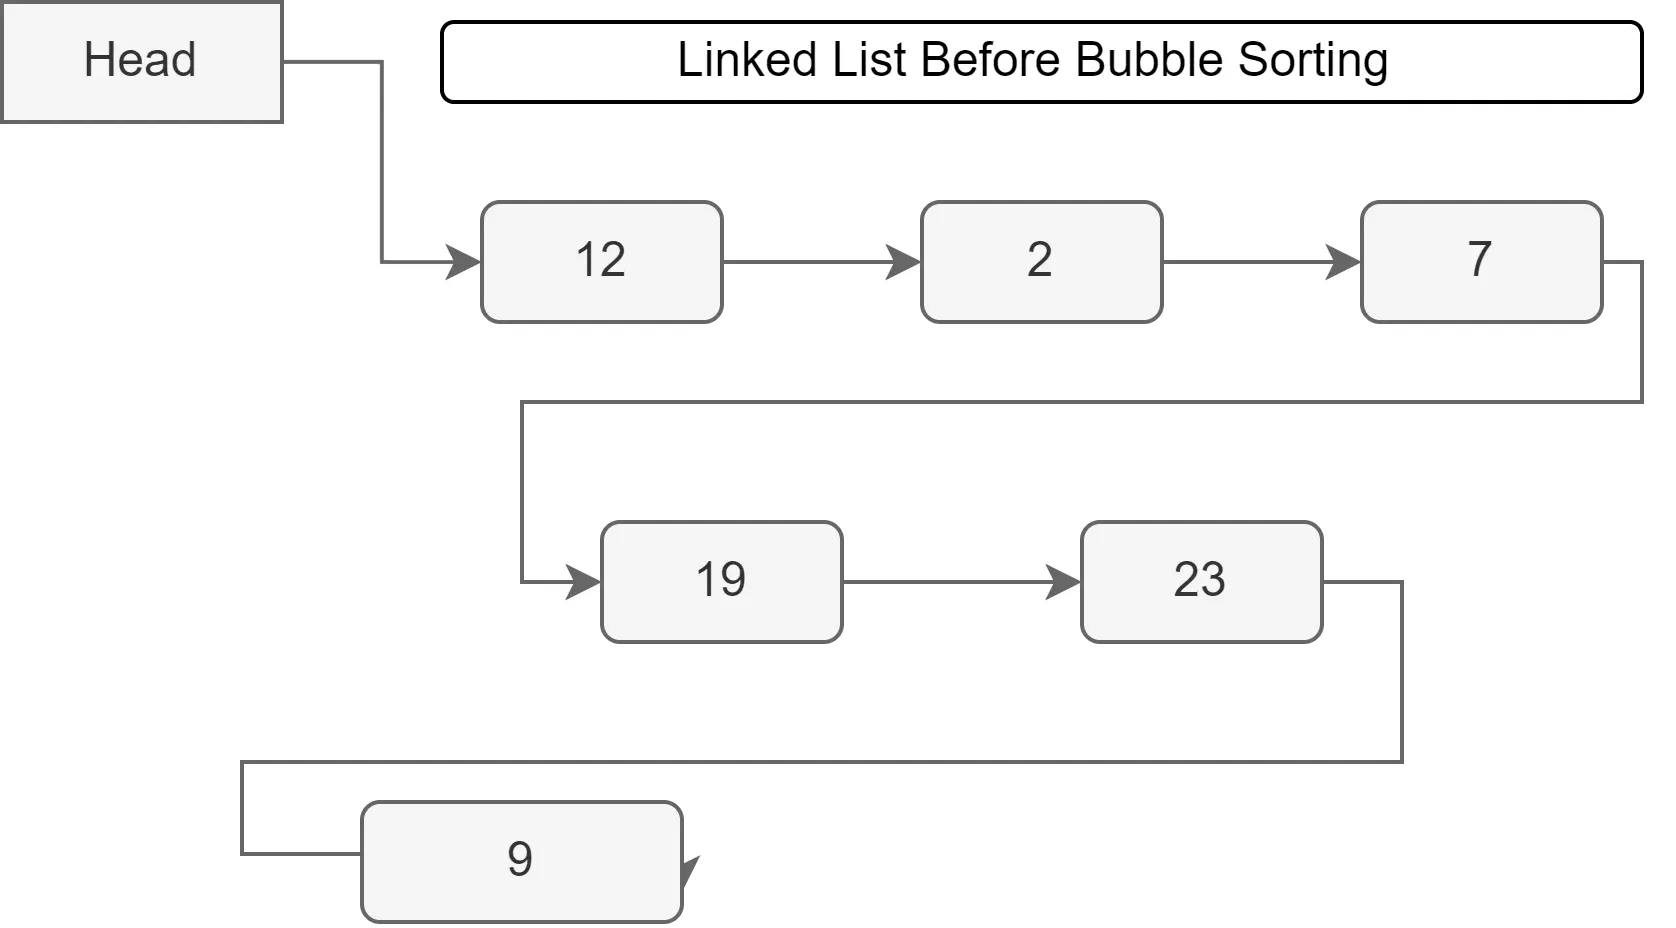
정렬 전 연결 목록:

암호:
```java
class SortLL {
  public static class Mynode {
    int indx;
    Mynode fwdMynode;

    public Mynode(int indx) {
      this.indx = indx;
      this.fwdMynode = null;
    }
    public int getindx() {
      return this.indx;
    }
  }
  // My node class
  private Mynode head;
  private int size;
  public SortLL() {
    this.head = null;
    this.size = 0;
  }
  public void add(int indx) {
    Mynode Mynode = new Mynode(indx);
    if (head == null) {
      head = Mynode;
    } else {
      Mynode CN = head;
      while (CN.fwdMynode != null) {
        CN = CN.fwdMynode;
      }
      CN.fwdMynode = Mynode;
    }
    size++;
  }
  public void sort() {
    if (size > 1) {
      boolean dtr;
      do {
        Mynode thisMynode = head;
        Mynode ladtMynode = null;
        Mynode fwd = head.fwdMynode;
        dtr = false;

        while (fwd != null) {
          if (thisMynode.indx > fwd.indx) {
            dtr = true;
            if (ladtMynode != null) {
              Mynode sig = fwd.fwdMynode;

              ladtMynode.fwdMynode = fwd;
              fwd.fwdMynode = thisMynode;
              thisMynode.fwdMynode = sig;
            } else {
              Mynode sig = fwd.fwdMynode;
              head = fwd;
              fwd.fwdMynode = thisMynode;
              thisMynode.fwdMynode = sig;
            }
            ladtMynode = fwd;
            fwd = thisMynode.fwdMynode;
          } else {
            ladtMynode = thisMynode;
            thisMynode = fwd;
            fwd = fwd.fwdMynode;
          }
        }
      } while (dtr);
    }
  }
  public int listSize() {
    return size;
  }
  public void printindx() {
    Mynode CN = head;

    while (CN != null) {
      int indx = CN.getindx();
      System.out.print(indx + " ");
      CN = CN.fwdMynode;
    }
    System.out.println();
  }
  public boolean isEmpty() {
    return size == 0;
  }
}
// indxInterface class
class SrtBubb {
  public static void main(String[] args) {
    SortLL s = new SortLL();
    s.add(12);
    s.add(2);
    s.add(7);
    s.add(19);
    s.add(23);
    s.add(9);
    System.out.println("Before Performing Bubble Sort");
    s.printindx();
    s.sort();
    System.out.println("After Performing Bubble Sort");
    s.printindx();
    System.out.println("Size of the linked list is: " + s.listSize());
  }
}
```
-
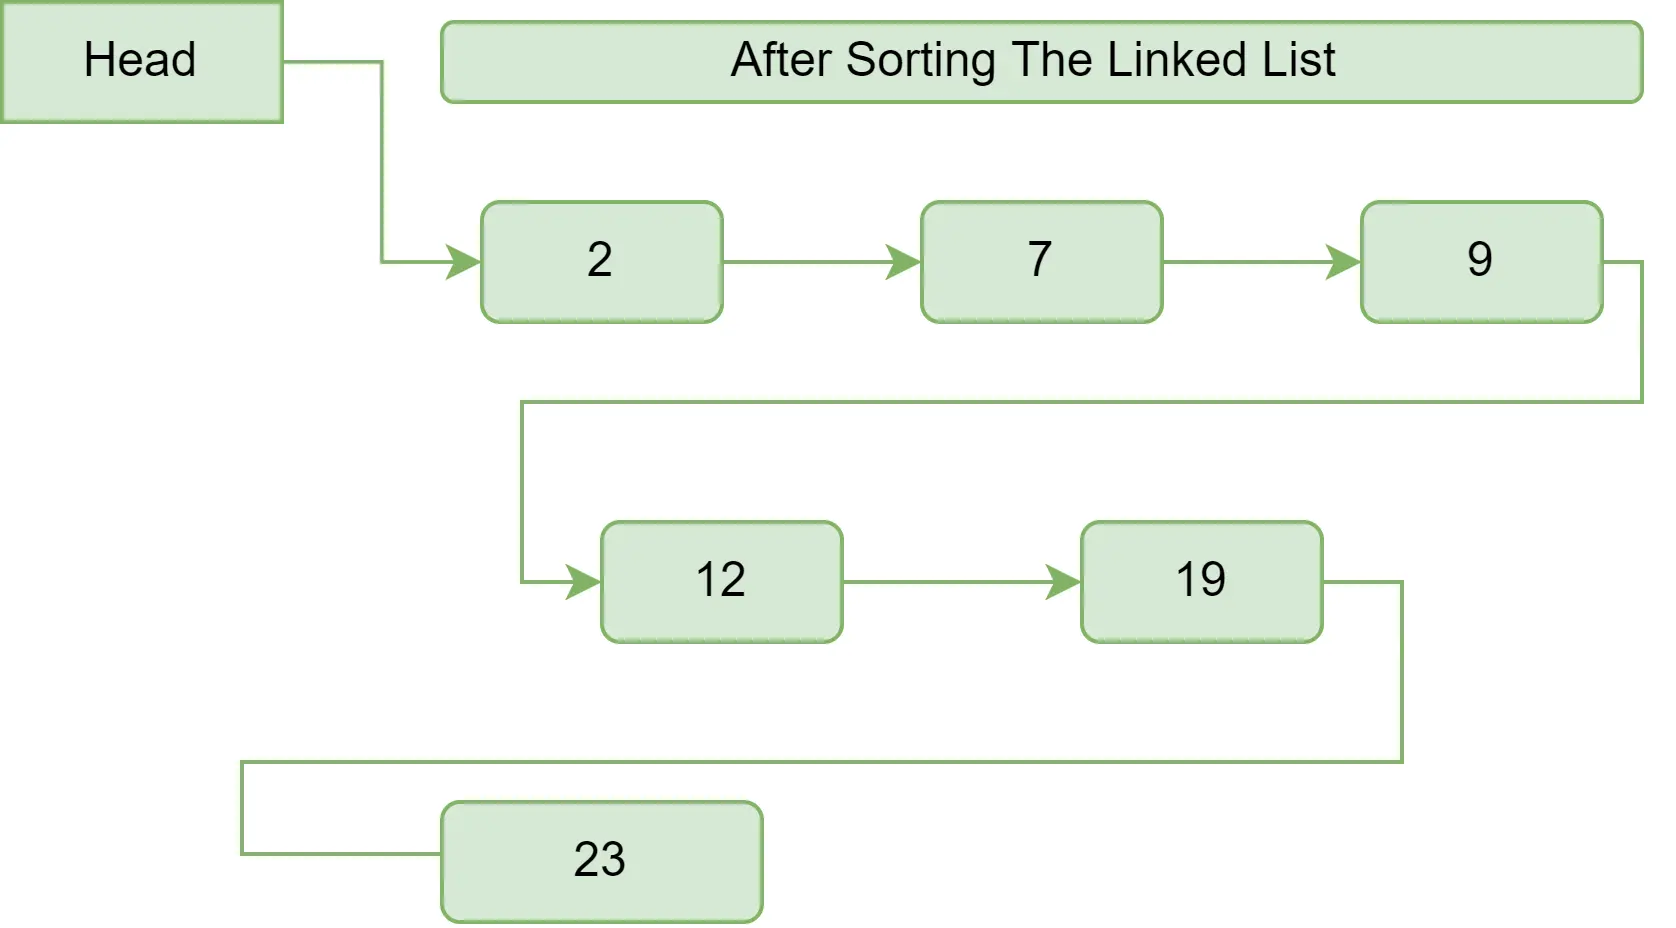
수동 버블 정렬을 수행한 후:

출력:
Before Performing Bubble Sort
12 2 7 19 23 9
After Performing Bubble Sort
2 7 9 12 19 23
Size of the linked list is: 6
요구 사항에 따라 이 프로그램을 수정할 수 있습니다. 그러나 이것은 버블 정렬을 사용하여 연결 목록을 수동으로 정렬하는 방법을 초보자가 이해하는 가장 실용적인 방법입니다.
이 주제에 대해 여전히 혼란스럽다고 가정합니다. 파일 디렉토리에 코드도 제공했습니다.
Sarwan Soomro is a freelance software engineer and an expert technical writer who loves writing and coding. He has 5 years of web development and 3 years of professional writing experience, and an MSs in computer science. In addition, he has numerous professional qualifications in the cloud, database, desktop, and online technologies. And has developed multi-technology programming guides for beginners and published many tech articles.
LinkedIn