How to Schedule a Python Script on Task Scheduler in Windows 10

This article explains the process of scheduling a Python script in Windows 10. Task Scheduler in Windows 10 is a program or a tool through which you can schedule a task to be executed.
You can choose some predefined actions to be executed when a certain condition is fulfilled.
For example, you can run a backup script every night at a fixed or scheduled time. You can make a task scheduler to send an email to your account when a predefined event occurs.
Schedule a Python Script in Windows 10
You need multiple steps to schedule a Python script with Windows Task Scheduler.
-
First, check if the Python interpreter is installed on Windows or not. To check this, open the command prompt and type
python3, as shown in the below picture.You will get the output like this. It means the Python interpreter is already installed.

The Python command line will also be opened. To exit this, press Ctrl+Z and then enter.
-
Next, you need to find out where the Python interpreter is installed. To check this, write the following command.
python -c "import os, sys; print(os.path.dirname(sys.executable))"This will return the path like this:

You can verify this by going to the output directory. Save this path with
python.exefor later use. -
You need to prepare the script you want to schedule. For demo purposes, we will write a simple script that writes the time to a text file every time it runs.
The code is as follows:

```python
import datetime

text_file = open(
    r"C:\Users\senar\Desktop\Content Writing\schedule script\result.txt", "a"
)
text_file.write(f"{datetime.datetime.now()} - the script ran. \n")
```

The above code opens a text file and writes its current time. Save this script as a `.py` file in some directory and note down its path.

Now we have two file paths—one for the script and one for the Python interpreter from step 2.
-
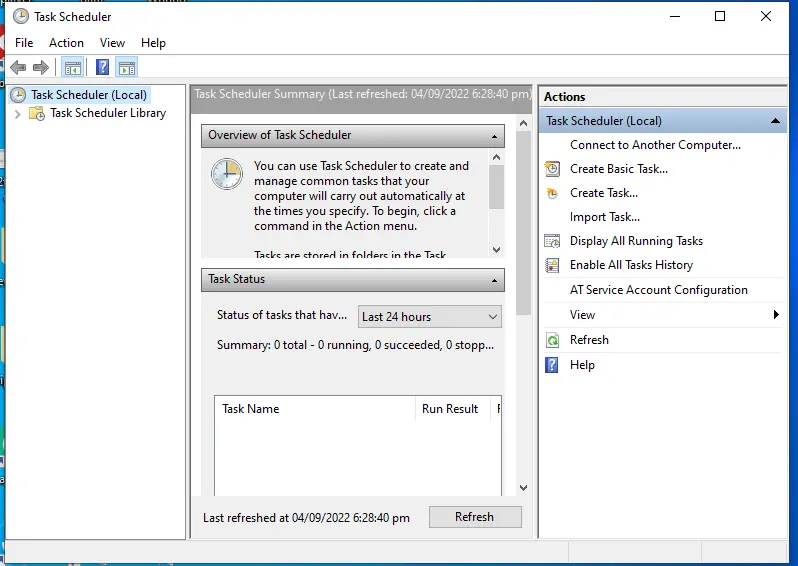
Go to Windows startup, search
Task Scheduler, and open it up. The following window will appear.
-
Select
Create Taskfrom the right sidebar and enter the task details, as shown below.
-
Go to the
Triggerstab and press theNewbutton. The below window will appear.This is where you will enter scheduling details. Enter the details and press the
OKbutton.

-
Go to the
Actionstab and press theNewbutton.
-
In the
Actionstab, chooseStart a programasActionand enter the following three details.- Program/script - the path to Python interpreter from step 2.
- Add arguments (optional) - script name (e.g.
schedule_script.py) - Start in (optional) - the path to Python script from step 3.

After that, press OK and then OK again. The following window will appear.
Enter the password and press OK. Your task will appear in the scheduled tasks.

This is where you have completed the scheduling process. You have activated the trigger, and your Python script code will run automatically per your added trigger details. For additional assistance, you can consult this guide on How to Run Python Script in Terminal.
The above script will produce the results.

After every 5 minutes, the Python script will run automatically and append the details on the next line, as shown above.