How to Draw a Rectangle Using OpenCV Module in Python

OpenCV is a real-time computer vision library. It is available for programming languages such as Python, Java, and C++. Using OpenCV, we can draw shapes and process images efficiently.
In this article, we will learn how to use the OpenCV module to draw rectangles.
Draw Rectangles Using OpenCV
OpenCV module has a rectangle() function that can be used to draw rectangles. It returns an image object. It accepts the following arguments.
img: It is the image object over which the rectangle has to be created.pt1: It is the starting coordinates of the rectangle. It accepts a tuple with an x-coordinate value and a y-coordinate value.pt2: It is the ending coordinates of the rectangle. It accepts a tuple with an x-coordinate value and a y-coordinate value.color: It is a tuple representing the colour of the rectangle. OpenCV considers BGR format by default. So, values have to be entered in BGR, instead of the general RGB format. For example,(255, 0, 0)represents Blue and(0, 0, 255)represents Red.thickness: It is the thickness of the border of the rectangle. Its units arepx. The thickness of-1will fill the rectangle with the specified colour. For other positive thickness values, the rectangle will not be filled with the specified colour. It will be only applicable to the border.
Now let us see how we can practically use this function to draw rectangles. Refer to the following code for an example.
import cv2

image_url = "full\\path\\to\\the\\image\\image.jpg"  # Full path is needed
image = cv2.imread(image_url, cv2.COLOR_BGR2RGB)
start_point = (140, 140)
end_point = (500, 500)
color = (0, 0, 255)
thickness = 3
image_with_rectangle = cv2.rectangle(
    img=image, pt1=start_point, pt2=end_point, color=color, thickness=thickness
)
cv2.imshow("Image with a Rectangle", image_with_rectangle)
cv2.waitKey(0)
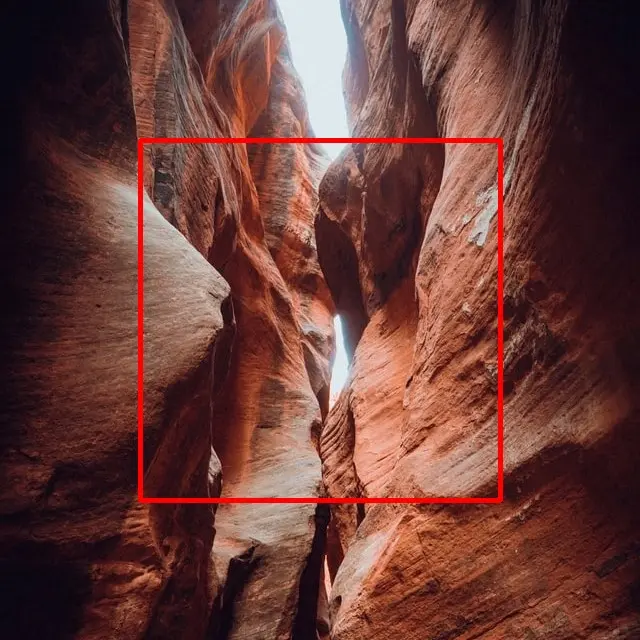
The above code first loads the image from the specified path, converts the BGR colour order to RGB colour order using cv2.COLOR_BGR2RGB, and then draws a rectangle of size 360 x 360 over the image. Note that the thickness value is positive. This means that the rectangle will not have a fill colour.
Furthermore, we have this cv2.waitKey(0) statement at the end of the code. It prevents the image from closing automatically once the program is executed. If the program is run without this statement, the modified image will appear and then immediately close.
Output:

What if we change the value of thickness to -1? In that case, the rectangle will have a fill colour. Refer to the following code for the same.
import cv2

image_url = "full\\path\\to\\the\\image\\image.jpg"  # Full path is needed
image = cv2.imread(image_url, cv2.COLOR_BGR2RGB)
start_point = (140, 140)
end_point = (500, 500)
color = (0, 255, 255)
thickness = -1
image_with_rectangle = cv2.rectangle(
    img=image, pt1=start_point, pt2=end_point, color=color, thickness=thickness
)
cv2.imshow("Image with a Rectangle", image_with_rectangle)
cv2.waitKey(0)
Output:

