How to Crop Image Using OpenCV in Python
- Method 1: Cropping Using NumPy Array Slicing
- Method 2: Cropping Using OpenCV ROI (Region of Interest)
- Method 3: Cropping with Mouse Events
- Conclusion
- FAQ Section
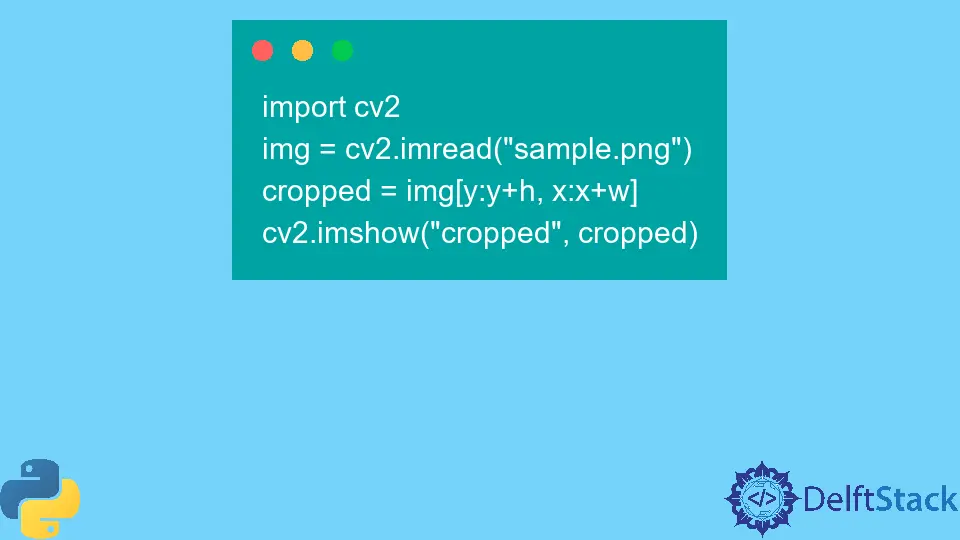
Image processing is a crucial skill for developers, especially in fields like computer vision, machine learning, and digital media. One of the most common tasks in image processing is cropping images. Cropping helps to focus on a specific area of an image, removing unnecessary parts and enhancing the overall visual quality.
In this article, we will explore how to crop images using OpenCV in Python. We will cover various methods, provide clear and well-commented code examples, and offer detailed explanations to help you understand each approach. Whether you’re a beginner or an experienced programmer, this guide will equip you with the skills you need to manipulate images effectively.
Method 1: Cropping Using NumPy Array Slicing
One of the simplest ways to crop an image in OpenCV is by utilizing NumPy array slicing. OpenCV reads images as NumPy arrays, allowing you to manipulate the pixel values directly. This method is straightforward and efficient for cropping rectangular areas of an image.
Step-by-Step Process
- Import Libraries: Begin by importing the required libraries, including OpenCV and NumPy.
- Load the Image: Use
cv2.imread()to load the image you want to crop. - Define Crop Coordinates: Specify the coordinates for the top-left and bottom-right corners of the crop area.
- Crop the Image: Use array slicing to extract the desired region.
- Display the Cropped Image: Utilize
cv2.imshow()to visualize the cropped result.
Code Example
import cv2
import numpy as np

# Load the image
image = cv2.imread('path/to/your/image.jpg')

# Define the coordinates for cropping (y_start:y_end, x_start:x_end)
cropped_image = image[50:200, 100:300]

# Display the cropped image
cv2.imshow('Cropped Image', cropped_image)
cv2.waitKey(0)
cv2.destroyAllWindows()
In this method, we load the image using OpenCV’s imread() function. The image is represented as a NumPy array, where each pixel can be accessed using its coordinates. By specifying the range of rows and columns, we can slice the array to obtain the cropped image. The imshow() function displays the cropped image in a window, allowing you to view the result immediately. This method is efficient and provides precise control over the cropping process.
Method 2: Cropping Using OpenCV ROI (Region of Interest)
Another effective method for cropping images in OpenCV is by using the Region of Interest (ROI) technique. This method is particularly useful when you want to crop a specific area based on dynamic input or conditions.
Step-by-Step Process
- Import Libraries: Start by importing OpenCV.
- Load the Image: Use
cv2.imread()to load your image. - Define the ROI: Specify the coordinates for the region you want to crop.
- Crop the Image: Use the ROI to extract the desired area.
- Display the Cropped Image: Use
cv2.imshow()to view the result.
Code Example
import cv2

# Load the image
image = cv2.imread('path/to/your/image.jpg')

# Define the Region of Interest (ROI)
x, y, w, h = 100, 50, 200, 150  # x, y, width, height
roi = image[y:y+h, x:x+w]

# Display the cropped image
cv2.imshow('Cropped ROI', roi)
cv2.waitKey(0)
cv2.destroyAllWindows()
In this method, we define a Region of Interest (ROI) by specifying the top-left corner’s coordinates (x, y) along with the width (w) and height (h) of the desired area. The image[y:y+h, x:x+w] syntax allows us to slice the image array accordingly. This method is particularly useful for applications where the cropping area may change based on user input or program logic. By using ROIs, you can dynamically adjust which part of the image to focus on.
Method 3: Cropping with Mouse Events
For a more interactive approach, you can crop images using mouse events in OpenCV. This method allows users to select the cropping area visually, making it ideal for applications where precision is essential.
Step-by-Step Process
- Import Libraries: Import OpenCV and NumPy.
- Load the Image: Use
cv2.imread()to load the image. - Define Mouse Callback: Create a function to handle mouse events and select the cropping area.
- Display the Image: Use
cv2.imshow()to show the image. - Crop the Selected Area: Extract the area based on user selection.
Code Example
import cv2

# Global variables to store the cropping coordinates
start_point = None
end_point = None

# Mouse callback function to capture the cropping area
def select_area(event, x, y, flags, param):
    global start_point, end_point
    if event == cv2.EVENT_LBUTTONDOWN:
        start_point = (x, y)
    elif event == cv2.EVENT_LBUTTONUP:
        end_point = (x, y)
        cv2.rectangle(image, start_point, end_point, (0, 255, 0), 2)
        cv2.imshow('Image', image)

# Load the image
image = cv2.imread('path/to/your/image.jpg')
cv2.namedWindow('Image')
cv2.setMouseCallback('Image', select_area)

# Display the image
cv2.imshow('Image', image)
cv2.waitKey(0)

# Crop the image based on selected points
if start_point and end_point:
    cropped_image = image[start_point[1]:end_point[1], start_point[0]:end_point[0]]
    cv2.imshow('Cropped Image', cropped_image)
    cv2.waitKey(0)

cv2.destroyAllWindows()
In this interactive method, we define a mouse callback function that captures the start and end points of the cropping rectangle. The user can click and drag to select the area visually. When the mouse button is released, the selected area is highlighted with a rectangle, and the cropping operation is performed based on the defined coordinates. This method enhances user experience and provides a practical way to crop images with precision.
Conclusion
Cropping images is a fundamental task in image processing, and OpenCV in Python offers various methods to achieve this. From simple NumPy slicing to interactive mouse events, each method has its advantages and use cases. Understanding these techniques will empower you to manipulate images effectively, whether for personal projects or professional applications. With the knowledge gained from this guide, you can confidently crop images and explore further functionalities in OpenCV.
FAQ Section
- What is OpenCV?
OpenCV (Open Source Computer Vision Library) is a powerful library used for computer vision and image processing tasks. It provides various functionalities for image manipulation, analysis, and machine learning. - How do I install OpenCV in Python?
You can install OpenCV using pip by running the command:pip install opencv-python - Can I crop images in formats other than JPEG?
Yes, OpenCV supports various image formats, including PNG, BMP, and TIFF. You can use the same methods to crop images regardless of their format. - How can I save the cropped image?
You can save the cropped image using thecv2.imwrite()function. For example:cv2.imwrite('path/to/save/cropped_image.jpg', cropped_image) - Is there a way to resize the cropped image?
Yes, you can resize the cropped image using thecv2.resize()function. For example:resized_image = cv2.resize(cropped_image, (width, height))

Manav is a IT Professional who has a lot of experience as a core developer in many live projects. He is an avid learner who enjoys learning new things and sharing his findings whenever possible.
LinkedIn