Tkinter Canvas Text
- Creating a Basic Tkinter Canvas
- Customizing Text Attributes
- Positioning Text with Anchor Points
- Adding Dynamic Text to Your Canvas
- Conclusion
- FAQ
When working with graphical user interfaces in Python, Tkinter is a go-to library for many developers. One of its versatile features is the Canvas widget, which allows for the creation of complex layouts and drawings. Among its many capabilities, adding text to a canvas is particularly useful for labeling, annotating, or simply enhancing the visual appeal of your application. The create_text() function in the Canvas class is the key to this functionality.
In this article, we’ll explore how to effectively use the create_text() function to add text to your Tkinter canvas, providing clear examples and explanations along the way. Whether you’re a beginner or looking to refine your skills, this guide will help you master adding text in Tkinter.
Before diving into adding text, it’s essential to understand what a Tkinter Canvas is. The Canvas widget provides a space where you can draw shapes, create images, and display text. It’s like a blank slate where you can unleash your creativity. The create_text() function is specifically designed for adding text to this canvas, allowing you to specify various attributes such as position, font, and color.
To get started, you need to have Tkinter installed and set up in your Python environment. Once you have that, you can create a basic canvas and add text to it using the create_text() method.
Creating a Basic Tkinter Canvas
Let’s start by creating a simple Tkinter application that includes a canvas. In this example, we’ll set up a window and draw some text on the canvas.
import tkinter as tk
root = tk.Tk()
canvas = tk.Canvas(root, width=400, height=300)
canvas.pack()
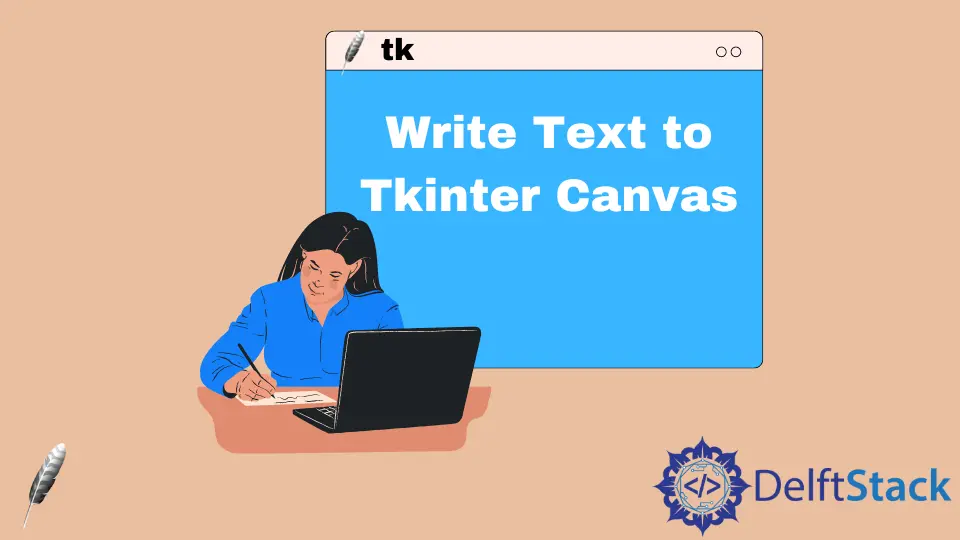
canvas.create_text(200, 150, text="Hello, Tkinter!", font=("Arial", 24), fill="blue")
root.mainloop()
Output:
In this code, we first import the Tkinter module and create a root window. We then initialize a Canvas widget with a width of 400 pixels and a height of 300 pixels.
The create_text(x, y, font, text,...) function can be used to write text to our Tkinter Canvas. The create_text() function takes many parameters, but we are only interested in the first 4 parameters for now. The first 2 parameters, x and y, are the coordinates. The following parameter, font, is the font of the text, and the fourth parameter, text, is the actual text.
Finally, mainloop() starts the Tkinter event loop, making the window responsive.
This simple example demonstrates how easy it is to add text to a Tkinter canvas. You can adjust the position, font, and color to suit your design needs.
Customizing Text Attributes
Now that we have a basic canvas with text, let’s explore how to customize the text attributes further. You can change the font style, size, and color to enhance the appearance of your text. Here’s an example that showcases these customizations.
import tkinter as tk
root = tk.Tk()
canvas = tk.Canvas(root, width=400, height=300)
canvas.pack()
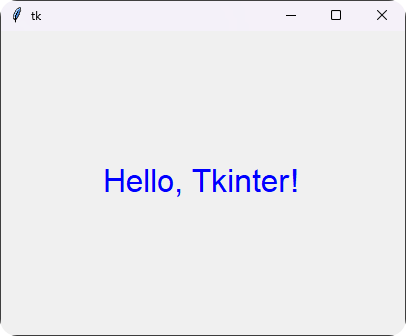
canvas.create_text(200, 100, text="Welcome to Tkinter!", font=("Helvetica", 30, "bold"), fill="green")
canvas.create_text(200, 200, text="Enjoy your coding journey!", font=("Times New Roman", 20, "italic"), fill="red")
root.mainloop()
Output:
In this example, we add two lines of text with different fonts and styles. The first line uses the Helvetica font in bold, while the second line employs Times New Roman in italic. The create_text() function allows for a variety of font settings, including style and size, making it a powerful tool for customizing text on your canvas.
By experimenting with different font styles and colors, you can create visually appealing interfaces that enhance user experience. Text customization is key to making your application stand out.
Positioning Text with Anchor Points
Positioning text accurately on a canvas is crucial for creating a polished look. Tkinter provides anchor points that allow you to specify how the text is aligned relative to the x and y coordinates you provide. The default anchor is the center of the text, but you can change this to align it differently.
Here’s an example that demonstrates how to use anchor points effectively.
import tkinter as tk
root = tk.Tk()
canvas = tk.Canvas(root, width=400, height=300)
canvas.pack()
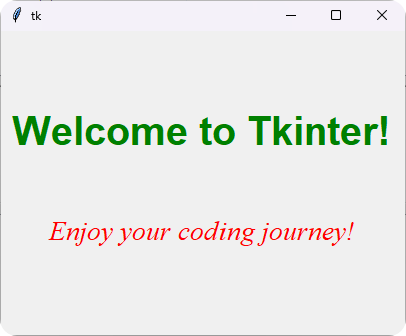
canvas.create_text(100, 150, text="Left Aligned", font=("Arial", 20), fill="purple", anchor="w")
canvas.create_text(200, 150, text="Center Aligned", font=("Arial", 20), fill="orange", anchor="center")
canvas.create_text(300, 150, text="Right Aligned", font=("Arial", 20), fill="cyan", anchor="e")
root.mainloop()
Output:
In this code snippet, we create three lines of text aligned differently using the anchor parameter. The first line is left-aligned (anchor "w"), the second is center-aligned, and the third is right-aligned (anchor “e”). This flexibility in positioning allows you to create a layout that meets your design requirements. By mastering anchor points, you can ensure that your text appears exactly where you want it on the canvas.
Adding Dynamic Text to Your Canvas
Sometimes, you might want to add text dynamically based on user input or other events. Tkinter makes it easy to update the text on your canvas. Here’s how you can do that with a simple example.
import tkinter as tk

def update_text():
    canvas.itemconfig(text_id, text="Text Updated!")

root = tk.Tk()
canvas = tk.Canvas(root, width=400, height=300)
canvas.pack()

text_id = canvas.create_text(200, 150, text="Initial Text", font=("Arial", 24), fill="black")
button = tk.Button(root, text="Update Text", command=update_text)
button.pack()

root.mainloop()
Output:
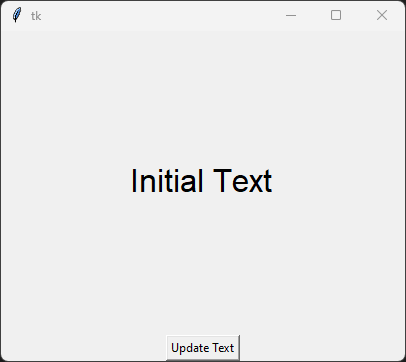
In this example, we create a button that, when clicked, updates the text on the canvas. The itemconfig() method allows us to modify the existing text by referencing its ID (text_id). This is particularly useful for applications where text needs to change based on user interactions or other events. By allowing dynamic updates, you can create a more interactive and engaging user experience.
Conclusion
Adding text to a Tkinter canvas is a straightforward yet powerful feature that can enhance the functionality and aesthetic appeal of your applications. With the create_text() function, you can customize text attributes, position text precisely, and even update it dynamically based on user input. Whether you’re creating a simple application or a complex interface, mastering text on the canvas will significantly improve your Tkinter projects. So, get creative and start experimenting with text on your canvas today!
FAQ
-
How do I change the font of the text in Tkinter?
You can change the font by specifying the font parameter in the create_text() function. For example, font=(“Arial”, 24) sets the font to Arial with a size of 24. -
Can I change the color of the text in Tkinter?
Yes, you can change the color by using the fill parameter in the create_text() function. For example, fill=“red” will set the text color to red. -
How do I align text in Tkinter?
You can align text using the anchor parameter in the create_text() function. Options include “w” for left, “e” for right, and “center” for center alignment. -
Is it possible to update the text dynamically in Tkinter?
Yes, you can update the text dynamically using the itemconfig() method, which allows you to change the text of an existing text item on the canvas. -
What is the default anchor point for text in Tkinter?
The default anchor point for text in Tkinter is the center of the text. You can change this by specifying a different anchor point in the create_text() function.

Maisam is a highly skilled and motivated Data Scientist. He has over 4 years of experience with Python programming language. He loves solving complex problems and sharing his results on the internet.
LinkedIn