How to Use a Timer in Tkinter
- Method 1: Using the after() Method
- Method 2: Using a Repeating Timer with after()
- Method 3: Using a Stop Timer Functionality
- Conclusion
- FAQ

Creating interactive applications in Python is a breeze with Tkinter, especially when you want to incorporate time-based features. Timers can enhance user experience by allowing you to schedule events, perform actions after a delay, or create countdowns.
In this tutorial, we’ll explore how to use a timer in Tkinter effectively. Whether you’re building a simple stopwatch, a countdown timer, or an application that requires periodic updates, understanding how to implement a timer will significantly boost your project’s functionality. Let’s dive into the various methods of using timers in Tkinter with practical examples that you can easily adapt for your own applications.
Method 1: Using the after() Method
One of the simplest ways to implement a timer in Tkinter is by using the built-in after() method. This method allows you to call a function after a specified amount of time, measured in milliseconds. It’s perfect for creating delays or scheduling tasks.
Here’s a straightforward example demonstrating how to use the after() method to create a simple countdown timer:
import tkinter as tk

def countdown(count):
    if count > 0:
        label.config(text=str(count))
        root.after(1000, countdown, count-1)
    else:
        label.config(text="Time's up!")

root = tk.Tk()
root.title("Countdown Timer")
label = tk.Label(root, font=("Helvetica", 48), fg="red")
label.pack()
countdown(10)
root.mainloop()
In this example, we create a countdown timer that starts from 10 seconds. The countdown function updates the label every second. The after() method is called with a delay of 1000 milliseconds (1 second), and it recursively calls the countdown function until it reaches zero. When the countdown completes, it updates the label to indicate that the time is up.
Output:
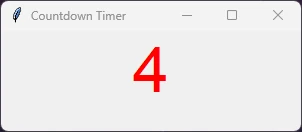
This method is efficient and straightforward for most timer-related tasks in Tkinter. You can adjust the countdown starting point by changing the argument passed to the countdown function.
Method 2: Using a Repeating Timer with after()
If you want a timer that repeats at regular intervals, the after() method can also be used for this purpose. This is particularly useful for applications that need to refresh data or perform actions periodically.
Here’s an example of a timer that updates the current time every second:
import tkinter as tk
import time

def update_time():
    current_time = time.strftime("%H:%M:%S")
    label.config(text=current_time)
    root.after(1000, update_time)

root = tk.Tk()
root.title("Real-Time Clock")
label = tk.Label(root, font=("Helvetica", 48), fg="blue")
label.pack()
update_time()
root.mainloop()
In this code, the update_time function retrieves the current time using the time module and updates the label every second. Similar to the previous example, the after() method is used to call update_time every 1000 milliseconds. This creates a dynamic clock that continuously updates, providing real-time feedback to the user.
Output:
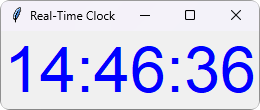
This method can be adapted for various applications, such as displaying live data or creating animations. By changing the content of the label, you can customize it to suit your needs.
Method 3: Using a Stop Timer Functionality
Sometimes, you may want to implement a timer that can be started and stopped based on user interaction. This gives users control over the timer, making your application more interactive.
Below is an example that demonstrates how to start and stop a countdown timer using buttons:
import tkinter as tk

def start_timer():
    global running
    running = True
    countdown(10)

def stop_timer():
    global running
    running = False

def countdown(count):
    if count > 0 and running:
        label.config(text=str(count))
        root.after(1000, countdown, count-1)
    elif count == 0:
        label.config(text="Time's up!")

root = tk.Tk()
root.title("Start/Stop Timer")
label = tk.Label(root, font=("Helvetica", 48), fg="green")
label.pack()

running = False

start_button = tk.Button(root, text="Start", command=start_timer)
start_button.pack()

stop_button = tk.Button(root, text="Stop", command=stop_timer)
stop_button.pack()

root.mainloop()
In this example, we introduce two buttons: “Start” and “Stop.” The start_timer function sets the running flag to True and begins the countdown. The stop_timer function sets the flag to False, halting the countdown if it’s currently running. The countdown function checks this flag to determine whether to continue counting down.
Output:
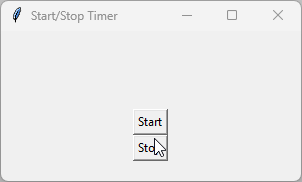
This approach allows users to control the timer, making it more versatile for various applications. You can expand upon this by adding features like reset buttons or different timer durations.
Conclusion
In this tutorial, we explored three effective methods for using timers in Tkinter: the after() method for simple countdowns, a repeating timer for real-time updates, and a start/stop functionality for user control. Each method provides unique capabilities that can enhance your applications, making them more interactive and user-friendly. By experimenting with these examples, you can create sophisticated timers tailored to your specific needs. Dive into your projects with confidence, and let your creativity flow!
FAQ
-
What is the purpose of the after() method in Tkinter?
The after() method is used to schedule a function to be called after a specified amount of time, allowing for timed events and updates in Tkinter applications. -
Can I use timers for animations in Tkinter?
Yes, timers can be effectively used for animations by repeatedly calling a function that updates the position or appearance of graphical elements. -
How can I reset a timer in Tkinter?
You can reset a timer by stopping the current countdown and restarting it with a new duration, typically by modifying the global state or variables controlling the timer. -
Is it possible to pause a timer in Tkinter?
Yes, you can implement pause functionality by using a flag to control whether the countdown continues, allowing users to pause and resume the timer. -
Can I create multiple timers in a single Tkinter application?
Absolutely! You can create multiple timers by defining separate functions and labels for each timer, managing them independently within the same application.

Founder of DelftStack.com. Jinku has worked in the robotics and automotive industries for over 8 years. He sharpened his coding skills when he needed to do the automatic testing, data collection from remote servers and report creation from the endurance test. He is from an electrical/electronics engineering background but has expanded his interest to embedded electronics, embedded programming and front-/back-end programming.
LinkedIn Facebook