How to Create a New Window by Clicking a Button in Tkinter
- Creating the Main Window and Button
- Customizing the New Window
- Handling Multiple New Windows
- Conclusion
- FAQ
Creating graphical user interfaces (GUIs) can be a fun and rewarding experience, especially when using Python’s Tkinter library. One common task in GUI development is opening a new window when a button is clicked.
This tutorial will guide you through the process of creating a new window in Tkinter, making it easy to enhance your applications with multiple views. Whether you’re building a simple tool or a more complex application, understanding how to manage windows is crucial.
By the end of this guide, you’ll be equipped with practical code examples and a clear understanding of how to implement this feature seamlessly.
Creating the Main Window and Button
The first step is to create the main window and add a button that will trigger the opening of a new window. Here’s how you can do it:
import tkinter as tk

def open_new_window():
    new_window = tk.Toplevel(root)
    new_window.title("New Window")
    new_window.geometry("300x200")
    label = tk.Label(new_window, text="This is a new window!")
    label.pack(pady=20)

root = tk.Tk()
root.title("Main Window")
root.geometry("400x300")

open_window_button = tk.Button(root, text="Open New Window", command=open_new_window)
open_window_button.pack(pady=50)

root.mainloop()
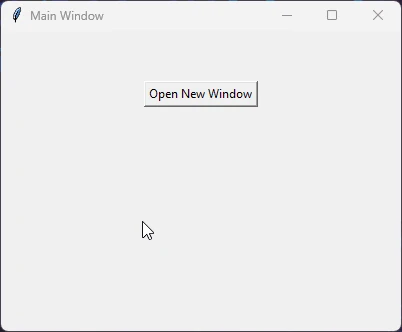
Output:
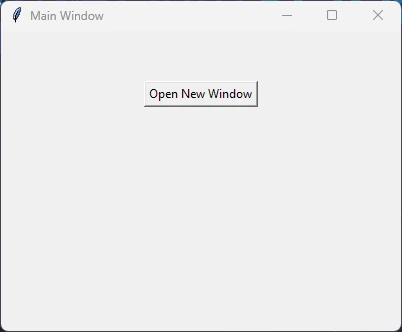
In this code, we start by importing the Tkinter library and creating the main application window. The open_new_window function is defined to create a new window using Toplevel, which allows multiple windows to be opened in the same application. The button is created and linked to this function via the command parameter. When clicked, it triggers the opening of the new window, displaying a simple label.
Customizing the New Window
Now that you can open a new window, let’s explore how to customize it further. You might want to add more widgets, like buttons or text fields, to enhance functionality. Here’s an example that includes a button in the new window to close it:
import tkinter as tk

def open_new_window():
    new_window = tk.Toplevel(root)
    new_window.title("New Window")
    new_window.geometry("300x200")

    label = tk.Label(new_window, text="This is a new window!")
    label.pack(pady=20)

    close_button = tk.Button(new_window, text="Close", command=new_window.destroy)
    close_button.pack(pady=10)

root = tk.Tk()
root.title("Main Window")
root.geometry("400x300")

open_window_button = tk.Button(root, text="Open New Window", command=open_new_window)
open_window_button.pack(pady=50)

root.mainloop()
Output:
In this updated example, we add a “Close” button to the new window. This button is linked to the destroy method of the new window, which effectively closes it when clicked. This simple addition enhances user experience by providing a way to easily close the window without needing to close the entire application.
Handling Multiple New Windows
As your application grows, you may find the need to manage multiple new windows. Tkinter allows you to create as many new windows as you want. However, managing them effectively is key to maintaining a smooth user experience. Here’s how you can create multiple new windows without any issues:
import tkinter as tk

def open_new_window():
    new_window = tk.Toplevel(root)
    new_window.title("New Window")
    new_window.geometry("300x200")

    label = tk.Label(new_window, text="This is a new window!")
    label.pack(pady=20)

root = tk.Tk()
root.title("Main Window")
root.geometry("400x300")

for i in range(3):
    open_window_button = tk.Button(root, text=f"Open Window {i+1}", command=open_new_window)
    open_window_button.pack(pady=10)

root.mainloop()
Output:

In this code, we use a loop to create three buttons on the main window. Each button opens a new window when clicked. This method is efficient and allows users to interact with multiple windows simultaneously. Each new window operates independently, giving users the flexibility to work across various sections of your application.
Conclusion
Creating a new window in Tkinter by clicking a button is a straightforward process that can greatly enhance the usability of your applications. By following the examples provided in this tutorial, you can easily implement this feature in your own projects. Whether you choose to customize your windows with additional widgets or manage multiple windows, Tkinter provides the tools you need to create a user-friendly interface. With practice, you’ll be able to leverage Tkinter’s capabilities to build more complex applications that meet your needs.
FAQ
-
How do I install Tkinter if it’s not available?
You can install Tkinter by using the package manager that comes with your Python installation. For example, on Ubuntu, you can use the commandsudo apt-get install python3-tk. -
Can I use images in my Tkinter windows?
Yes, you can use images in your Tkinter windows by importing thePhotoImageclass and using it in a label or button.
-
What is the difference between Tk and Toplevel?
Tkis the main application window, whileToplevelis used to create additional windows that are separate from the main window. -
How can I pass data between windows in Tkinter?
You can pass data between windows by defining variables in the main window and accessing them in the new window, or by using function parameters. -
Is Tkinter suitable for complex applications?
While Tkinter is great for simple to moderately complex applications, for more advanced needs, you might want to explore other GUI frameworks like PyQt or Kivy.

Founder of DelftStack.com. Jinku has worked in the robotics and automotive industries for over 8 years. He sharpened his coding skills when he needed to do the automatic testing, data collection from remote servers and report creation from the endurance test. He is from an electrical/electronics engineering background but has expanded his interest to embedded electronics, embedded programming and front-/back-end programming.
LinkedIn Facebook