How to Update Node.js
-
Use the
node --versionCommand to Check the Current Version of Node.js in Command Prompt - Use NVM to Update Node.js on macOS and Linux
- Use NVM-Windows to Update Node.js on Windows
- Use the Node.js Installer to Update Node.js on Linux, Windows, and macOS Systems

Node.js is an open-source server-side JavaScript runtime environment built on Chrome’s V8 JavaScript engine. Node.js is suitable for creating scripts that generate and render dynamic content and read, open and close files on the server.
Since Node.js is open-source software, many developers contribute to the software and fix bugs. Therefore, it means that frequent releases are addressing various security issues, bugs, and performance issues.
Major version releases usually maintain the current release tag for six months, after which versions released that are odd-numbered are no longer supported while those that are even-numbered enter into active LTS. Active LTS and maintenance LTS releases are recommended in production environments due to their stability, support, and predictability in version updates.
Here is the most recent release and maintenance schedule.
Use the node --version Command to Check the Current Version of Node.js in Command Prompt
Before updating the current version of Node.js, we need to be sure about the version that is currently running the system. We can check that by running the command below in the command prompt.
node --version
Using the shorter form of the above command will equally return the Node.js version currently running on your system.
node -v
Sample output:
v16.13.1
Use NVM to Update Node.js on macOS and Linux
One of the best ways to update Node.js on Linux and macOS is the NVM, also known as the Node Version Manager. It’s a utility tool that we can use to install or update any LTS version of Node.js and easily switch between different versions of Node.js.
We can install the NVM by directly downloading and running the scripts. Alternatively, we can install it using the curl or wget commands below.
curl -o- https://raw.githubusercontent.com/nvm-sh/nvm/v0.39.1/install.sh | bash
wget -qO- https://raw.githubusercontent.com/nvm-sh/nvm/v0.39.1/install.sh | bash
Using the above commands, you can install the latest version of NVM on your Linux machine. We need to execute the command below to install or update the latest Node.js.
nvm install 16.13.1
Using this command, we can install the current version that we want to replace by simply changing the version number, as shown below.
nvm install 17.3.0
Use NVM-Windows to Update Node.js on Windows
The NVM utility tool is only supported on macOS and Linux. Alternatively, we can use the nvm-windows to install or update Node.js on Windows systems.
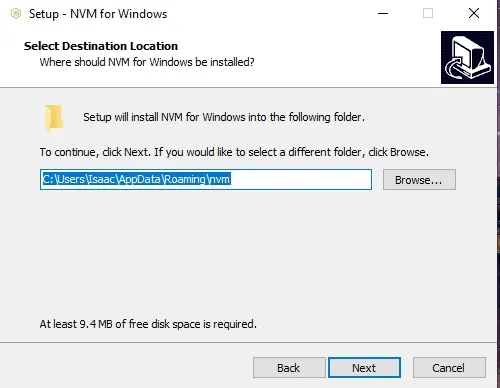
To install the nvm-windows utility tool, we need to visit the windows-mvn repository and download the installation files’ zip file. Unzip the file and open the nvm-setup.exe file to begin the installation process.

After the installation process, we can update Node.js using nvm-windows. However, we first need to check our system’s currently installed versions of Node.js. We can use the command below to do so.
nvm list
Sample output:

We will run the command below to update Node.js to the latest LTS version.
nvm install 16.13.1
Use the Node.js Installer to Update Node.js on Linux, Windows, and macOS Systems
Updating the Node.js using the Node.js installer is one of the most precise ways of updating Node.js on Linux, Windows, and macOS systems.
For Windows and macOS systems, we need to visit the official Node.js website at nodejs.org and download the respective installer file for LTS or the current version that we wish to update.

Once we have downloaded the installer, run through the simple installation process by following the instructions on the wizard. By doing so, you will have upgraded your Node.js version to the intended version.
We also need to download the binary archive for the version that we upgrade to Linux systems.

Once we have downloaded the binary archive, we can now unpack the binary files and run the commands below to get the version of Node.js that we want. In this case, we are upgrading to the latest version of Node.js.
We first need to unpack the binary archive to the folder where we want this version of Node.js installed.
VERSION=v16.13.1
DISTRO=linux-x64
sudo mkdir -p /usr/local/lib/nodejs
sudo tar -xJvf node-$VERSION-$DISTRO.tar.xz -C /usr/local/lib/nodejs
We need to set the environmental variable ~/.profile by adding the following to the end.
# Nodejs
VERSION=v16.13.1
DISTRO=linux-x64
export PATH=/usr/local/lib/nodejs/node-$VERSION-$DISTRO/bin:$PATH
Finally, we can now refresh the profile and test whether the installation was successful by running the two commands below.
. ~/.profile
$ node -v
On Linux, Mac OS, UNIX-like systems, and the Windows Subsystem for Linux(WLS), we can also use an interactive tool known as the n-package to download and upgrade Node.js.
With over 12 million downloads, this package is one of the best tools out there for managing multiple versions of Node.js.
Since it is readily available on the npm, we can easily install it globally using the command below.
npm install -g n
Run the command below to upgrade to the desired LTS version of Node.js.
n 16.13.1
We can run the command below to upgrade to the latest version.
n 17.3.0
It’s by no way the exhaustive list of methods that can be used to upgrade to the latest LTS or the current version of Node.js. However, using the most recent version guarantees enhanced security, better features, and performance.
Isaac Tony is a professional software developer and technical writer fascinated by Tech and productivity. He helps large technical organizations communicate their message clearly through writing.
LinkedIn
