How to Get Erosion of an Image in MATLAB
- Understanding Image Erosion
-
Using the
imerode()Function in MATLAB - Choosing the Right Structuring Element
- Combining Erosion with Other Morphological Operations
- Conclusion
- FAQ
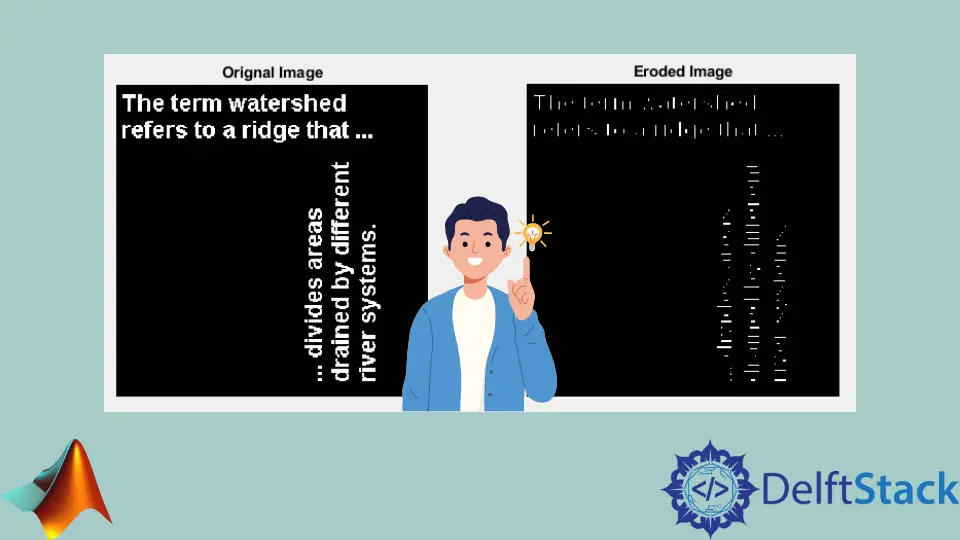
Image processing is a fascinating field that plays a crucial role in various applications, from medical imaging to computer vision. One of the fundamental operations in image processing is morphological erosion. In MATLAB, this can be easily achieved using the imerode() function. Erosion reduces the size of objects in a binary image, which can be especially useful for tasks like removing noise or separating connected objects.
In this article, we’ll explore how to effectively use the imerode() function in MATLAB, providing you with clear examples and explanations. Whether you’re a beginner or looking to refine your skills, this guide will help you navigate the process of image erosion with ease.
Understanding Image Erosion
Before diving into the code, let’s briefly discuss what image erosion is. Erosion is a morphological operation that removes pixels on object boundaries. In simpler terms, it shrinks the objects in a binary image. This operation is particularly beneficial when you want to eliminate small-scale noise or detach objects that are close to each other. The imerode() function in MATLAB accomplishes this by using a structuring element, which defines the shape and size of the erosion process.
Using the imerode() Function in MATLAB
To perform erosion in MATLAB, you will primarily use the imerode() function. The function takes two arguments: the input image and the structuring element. The structuring element is a matrix that determines how the erosion is applied. Below is a simple example demonstrating how to use this function.
% Read a binary image
img = imread('example_image.png');
% Create a structuring element
se = strel('disk', 3);
% Perform erosion
erodedImage = imerode(img, se);
% Display the original and eroded images
subplot(1, 2, 1), imshow(img), title('Original Image');
subplot(1, 2, 2), imshow(erodedImage), title('Eroded Image');
Output:

In this example, we first read a binary image using imread(). Next, we create a structuring element with a disk shape and a radius of 3 pixels using strel(). The imerode() function then applies this structuring element to the image, resulting in an eroded version. Finally, we use subplot() and imshow() to display both the original and eroded images side by side for comparison.
Choosing the Right Structuring Element
When using the imerode() function, the choice of the structuring element is critical. Different shapes and sizes can yield varying results. For instance, a disk-shaped structuring element is suitable for circular objects, while a rectangular or line-shaped element might be better for elongated structures.
Here’s an example of using a rectangular structuring element for erosion:
% Read a binary image
img = imread('example_image.png');
% Create a rectangular structuring element
se = strel('rectangle', [5, 3]);
% Perform erosion
erodedImage = imerode(img, se);
% Display the original and eroded images
subplot(1, 2, 1), imshow(img), title('Original Image');
subplot(1, 2, 2), imshow(erodedImage), title('Eroded Image');
Output:

In this code snippet, we create a rectangular structuring element of size 5 by 3 pixels. The erosion process will now take into account the shape of the structuring element, leading to different results compared to the disk-shaped element. Experimenting with various structuring elements can help you achieve the desired outcome for your specific image processing task.
Combining Erosion with Other Morphological Operations
Erosion is often used in conjunction with other morphological operations to achieve more complex effects. For instance, after eroding an image, you might want to perform dilation using the imdilate() function. This combination can help restore the original size of the objects while removing noise.
Here’s an example that first erodes and then dilates an image:
% Read a binary image
img = imread('example_image.png');
% Create a structuring element
se = strel('disk', 3);
% Perform erosion
erodedImage = imerode(img, se);
% Perform dilation
dilatedImage = imdilate(erodedImage, se);
% Display the original, eroded, and dilated images
subplot(1, 3, 1), imshow(img), title('Original Image');
subplot(1, 3, 2), imshow(erodedImage), title('Eroded Image');
subplot(1, 3, 3), imshow(dilatedImage), title('Dilated Image');
Output:
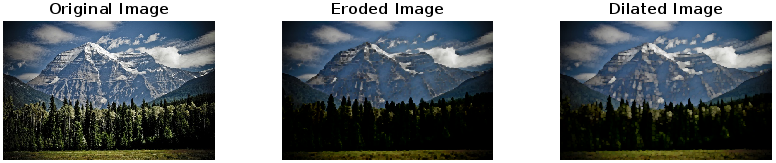
In this example, we first perform erosion on the original image and then apply dilation to the eroded image. The result is displayed alongside the original and eroded images. This technique can be particularly useful in scenarios where you want to clean up an image while maintaining the overall structure of the objects.
Conclusion
In summary, image erosion is a powerful tool in image processing that can help you achieve cleaner and more precise images. By using MATLAB’s imerode() function, you can easily manipulate binary images to remove noise or separate objects. Experimenting with different structuring elements and combining erosion with other morphological operations can lead to even more refined results. Whether you’re working on a project or simply exploring the world of image processing, mastering erosion in MATLAB is a valuable skill.
FAQ
-
What is the purpose of image erosion?
Image erosion is used to reduce the size of objects in a binary image, helping to eliminate noise and separate closely connected objects. -
How do I choose a structuring element for erosion?
The choice of structuring element depends on the shape and size of the objects in your image. Experiment with different shapes like disks, rectangles, or lines to see which works best for your specific image. -
Can I use erosion on grayscale images?
Erosion is primarily designed for binary images, but it can be applied to grayscale images using appropriate structuring elements to achieve similar effects. -
What happens if I use a larger structuring element for erosion?
A larger structuring element will result in more significant erosion, potentially removing more pixels from the object boundaries, which can lead to loss of important details. -
Is it possible to combine erosion with other image processing techniques?
Yes, erosion is often combined with other morphological operations like dilation and opening to achieve more complex effects and enhance image quality.
