How to Create an Alert Using jQuery

This tutorial will focus on creating or adding a jQuery alert. The quick answer is to use jQuery alert() and supply the content to display on the lookout as a parameter.
Create an Alert Using jQuery
jQuery provides several handy methods that may be used to execute various tasks in your application. One of the most excellent methods to display notifications to consumers is via a jQuery alert message.
When developing any code, you must utilize alert messages when a button is pressed, or an event occurs.
Syntax:
Alert(Specify Content)
Users must specify any text content they wish to show in the alert message box in the content parameter.
Example:
<script>
    $(document).ready(function () {
        $("#alert-id").click(function () {
            alert("Hello World! Welcome to upwork.");
        });
    });
</script>
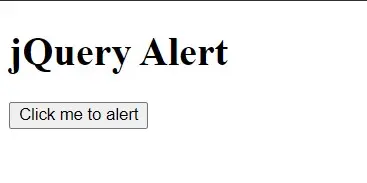
Output:

When you click the button, it triggers the click() function and gives the popup window showing some message.

Although jQuery does not include a built-in alert component for creating modal alerts, you can construct a stunning jQuery alert box in your web pages using plugins.
We’ll demonstrate how to use plugins to create various alerts, such as a primary alert with a simple message, an OK button, and prompt and confirmation alerts. Continue reading to see an example of a signal that includes HTML components such as a link.
Use the jAlert Plugin to Create Alerts
You may use the jAlert plugin to create alerts with various parameters for various alert kinds, for example, a primary or confirmation alert with an animation closing the warning and utilizing multiple colored buttons.
This plugin is also compatible with the most recent jQuery versions. You can download the latest version of the jAlert plugin from here.
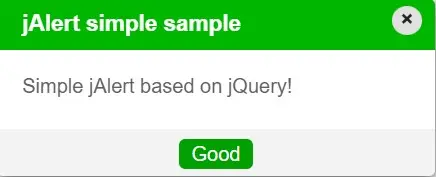
An essential jQuery alert is made in this sample, including a Good button to shut the alert window.

Here is the sample code. You can save the file and run it in your browser.
<!DOCTYPE html>
<html>
  <head>
    <script src="https://ajax.googleapis.com/ajax/libs/jquery/3.2.1/jquery.min.js"></script>
    <script src="jAlert.js"></script>
    <link rel="stylesheet" href="jAlert.css" />
  </head>

  <body>
    <h1>jQuery Alert</h1>

    <div>
      <button class="alertid">Simple jAlert</button>
    </div>
    <script>
      $(".alertid").on("click", function (e) {
        e.preventDefault();
        var btn = $(this),
          theme = "green";

        $.jAlert({
          title: "jAlert simple sample",
          content: "Simple jAlert based on jQuery!",
          theme: theme,
          closeOnClick: true,
          backgroundColor: "white",
          btns: [{ text: "Good", theme: theme }],
        });
      });
    </script>
  </body>
</html>
The theme variable is used to change the color of the alert. You may use different colors in different situations.
Similarly, the user may use the title parameter to set the title of an alert box. You can write the message to show in the content parameter.
For this demonstration, we utilized a white background. But you may also use black.
Set the jAlert Plugin
Enough with the internet demonstrations; here’s how you can use this fantastic plugin in your web project. Simply put, you should include the plugin libraries in the <head> section:

The first is the jQuery library, followed by the JS file for jAlert version 4, and finally, the CSS file.
Shiv is a self-driven and passionate Machine learning Learner who is innovative in application design, development, testing, and deployment and provides program requirements into sustainable advanced technical solutions through JavaScript, Python, and other programs for continuous improvement of AI technologies.
LinkedIn