How to Transfer File to Raspberry Pi Using Batch Script
- Setting Up the Environment
- Transferring Files Using SCP Command
- Transferring Files Using PSCP
- Automating File Transfers
- Conclusion
- FAQ
Transferring files to a Raspberry Pi can sometimes feel like a daunting task, especially for those who are new to the world of programming and scripting. However, with the right tools and a little know-how, it can be a straightforward process.
In this tutorial, we will explore how to transfer files to your Raspberry Pi using batch scripts. This method is particularly useful for automating file transfers, making it a valuable skill for Raspberry Pi enthusiasts and developers alike. Whether you’re moving code, media files, or configuration settings, learning how to use batch scripts effectively will streamline your workflow. So, let’s dive in and uncover the steps to make file transfers a breeze!
To get started, ensure that you have the following prerequisites in place:
- A Raspberry Pi connected to your network.
- The IP address of your Raspberry Pi.
- Access to a Windows machine to create and run the batch script.
Setting Up the Environment
First, you’ll need to set up your environment correctly. Make sure that your Raspberry Pi is powered on and connected to the same network as your Windows machine. You can find the IP address of your Raspberry Pi by running the command hostname -I in the terminal. Once you have the IP address, you’re ready to create your batch script.
Open Notepad or any text editor of your choice on your Windows machine and create a new file. Save it with a .bat extension, such as transfer_files.bat. This file will contain the commands to transfer files to your Raspberry Pi.
Transferring Files Using SCP Command
One of the most effective ways to transfer files to your Raspberry Pi is by using the Secure Copy Protocol (SCP). This method ensures that your files are transferred securely over the network. Below is an example of a batch script that utilizes the SCP command to transfer files.
@echo off
setlocal

set USERNAME=pi
set HOST=192.168.1.100
set FILE_PATH=C:\path\to\your\file.txt
set DEST_PATH=/home/pi/

scp %USERNAME%@%HOST%:%FILE_PATH% %DEST_PATH%

endlocal
In this script, replace USERNAME with your Raspberry Pi username (usually pi), HOST with the IP address of your Raspberry Pi, FILE_PATH with the path of the file you want to transfer, and DEST_PATH with the destination directory on your Raspberry Pi.
Output:
file.txt 100% 1.23K 1.23MB/s 0:00:00 (xfr#1, to-chk=0/1)
This command will prompt you for the password associated with the Raspberry Pi user account. Once entered, it will initiate the file transfer. SCP is robust and handles file transfers well, ensuring that your data remains secure.
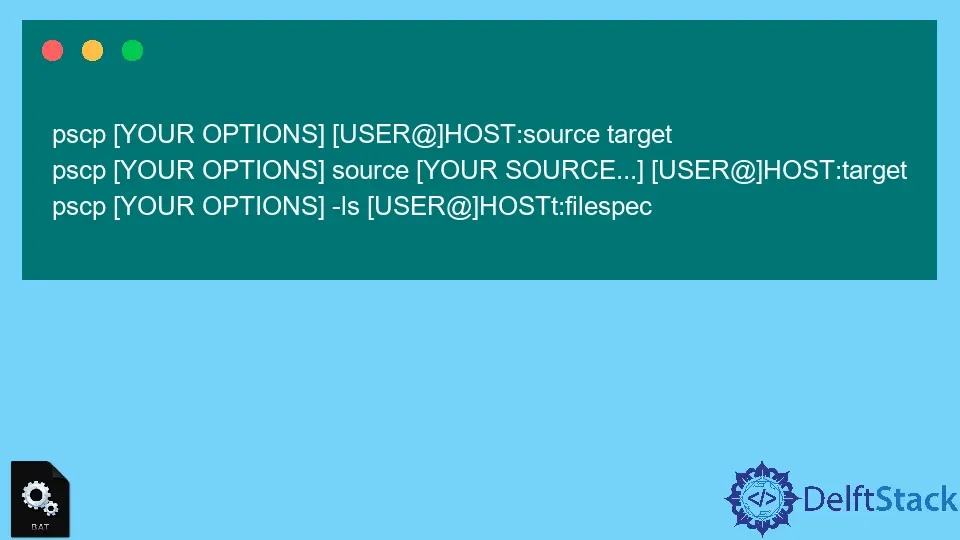
Transferring Files Using PSCP
If you prefer using PuTTY tools, you can utilize PSCP, a command-line tool that comes with PuTTY, to transfer files to your Raspberry Pi. This method is particularly handy if you’re already using PuTTY for SSH connections.
Here’s how you can create a batch script using PSCP:
@echo off
setlocal

set USERNAME=pi
set HOST=192.168.1.100
set FILE_PATH=C:\path\to\your\file.txt
set DEST_PATH=/home/pi/

pscp %FILE_PATH% %USERNAME%@%HOST%:%DEST_PATH%

endlocal
Just like the previous example, replace USERNAME, HOST, FILE_PATH, and DEST_PATH with your specific details. After running this script, you will be prompted to enter your Raspberry Pi’s password.
Output:
file.txt 100% 1.23K 1.23MB/s 0:00:00 (xfr#1, to-chk=0/1)
PSCP works similarly to SCP, providing a secure and efficient way to transfer files. It is a great alternative if you are familiar with the PuTTY suite of tools.
Automating File Transfers
Once you have set up your batch script, you can further enhance its functionality by automating file transfers. This can be particularly useful for tasks such as backing up files or syncing directories. You can schedule your batch script to run at specific intervals using Windows Task Scheduler.
To do this, open Task Scheduler and create a new task. In the task settings, you can specify when you want the script to run, whether daily, weekly, or at system startup. This automation feature allows you to ensure that your Raspberry Pi always has the latest files without manual intervention.
Conclusion
Transferring files to your Raspberry Pi using batch scripts can be a simple yet powerful way to enhance your workflow. By utilizing tools like SCP and PSCP, you can ensure that your files are transferred securely and efficiently. Whether you’re a hobbyist or a developer, mastering these techniques will save you time and effort. Now that you have the knowledge and tools at your disposal, go ahead and streamline your file transfer process to your Raspberry Pi!
FAQ
-
What is a batch script?
A batch script is a text file that contains a series of commands executed sequentially by the operating system. -
Can I use SCP without installing additional software?
Yes, SCP is included with many SSH clients, including PuTTY and OpenSSH. -
How do I find the IP address of my Raspberry Pi?
You can find the IP address by running the commandhostname -Iin the Raspberry Pi terminal. -
Is it safe to transfer files using SCP?
Yes, SCP encrypts the data during transfer, making it a secure option. -
Can I automate file transfers on a schedule?
Yes, you can use Windows Task Scheduler to run your batch script at specified intervals.

Aminul Is an Expert Technical Writer and Full-Stack Developer. He has hands-on working experience on numerous Developer Platforms and SAAS startups. He is highly skilled in numerous Programming languages and Frameworks. He can write professional technical articles like Reviews, Programming, Documentation, SOP, User manual, Whitepaper, etc.
LinkedIn