How to Reset Arduino
- Method 1: Using the Reset Button
- Method 2: Using the SoftwareReset Library
- Method 3: Using the Adafruit SleepyDog Library
- Conclusion
- FAQ
Resetting an Arduino can be a crucial task for developers and hobbyists alike. Whether you’re troubleshooting a sketch or simply want to restart your project, knowing how to reset your Arduino effectively can save you time and frustration.
In this article, we will explore three primary methods to reset your Arduino: using the reset button, the software reset library, and the Adafruit SleepyDog library. Each method has its unique advantages, and we’ll provide clear explanations and code examples to guide you through the process. So, let’s dive in and learn how to reset your Arduino like a pro!
Method 1: Using the Reset Button
The simplest way to reset your Arduino is by using the physical reset button located on the board. This button is typically labeled “RESET” and is usually found near the power jack. Pressing this button will restart your Arduino, terminating any currently running sketch and resetting all pins to their default states. This method is especially useful if your Arduino becomes unresponsive or if you need to quickly restart your project. If you encounter an issue where Arduino Port Greyed Out, pressing the reset button may be a helpful troubleshooting step.
To use the reset button, just follow these steps:
- Locate the reset button on your Arduino board.
- Press and hold the button for a moment.
- Release the button and watch your Arduino restart.
This method is straightforward and doesn’t require any additional software or coding. However, it may not be the best solution for automated resets or specific conditions in your project.
Method 2: Using the SoftwareReset Library
If you want to reset your Arduino programmatically, the SoftwareReset library is an excellent choice. This library allows you to reset the Arduino from within your sketch. To use this method, you first need to install the SoftwareReset library through the Arduino Library Manager. Once installed, you can include it in your sketch and call the reset function whenever needed.
Here’s a simple example of how to use the SoftwareReset library:
#include <SoftwareReset.h>

void setup() {
    Serial.begin(9600);
    Serial.println("Arduino will reset in 5 seconds...");
    delay(5000);
    SoftwareReset::reset();
}

void loop() {
}
Output:
Arduino will reset in 5 seconds...
In this code, we first include the SoftwareReset library. In the setup() function, we initialize the serial communication and print a message indicating that the Arduino will reset in 5 seconds. After a delay of 5 seconds, the SoftwareReset::reset() function is called, which resets the Arduino. This method is useful for scenarios where you might need to reset the Arduino based on certain conditions in your code. If you’re looking for ways to effectively manage and control Arduino pins within your code, consider learning about How to Toggle Pin in Arduino.
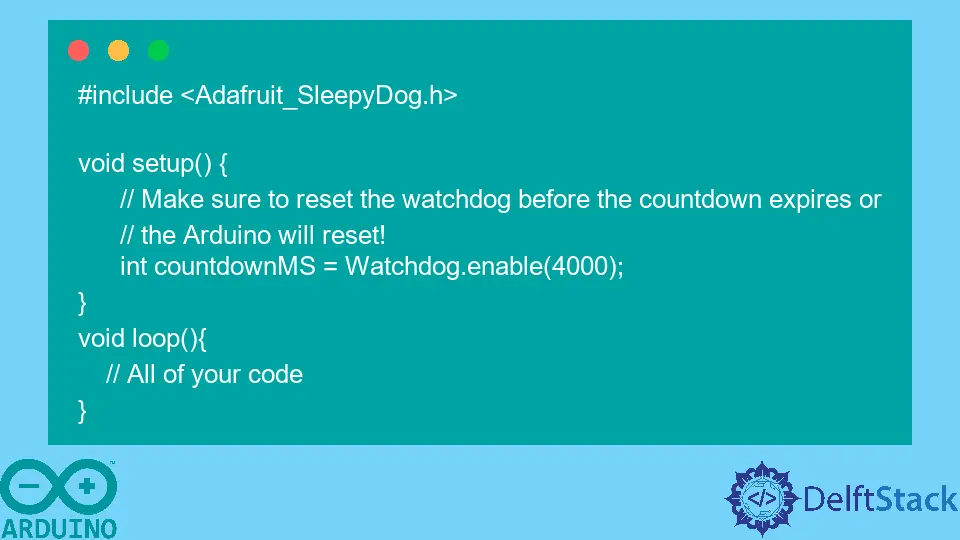
Method 3: Using the Adafruit SleepyDog Library
Another effective way to reset your Arduino is by using the Adafruit SleepyDog library. This library is primarily designed for managing power consumption in Arduino projects, but it also includes a handy reset feature. The SleepyDog library allows your Arduino to enter a low-power sleep mode and can automatically reset the board if it exceeds a specified timeout.
To use the Adafruit SleepyDog library, you will need to install it via the Arduino Library Manager. Once installed, you can use the following code snippet to implement the reset functionality:
#include <Adafruit_SleepyDog.h>

void setup() {
    Serial.begin(9600);
    Serial.println("Arduino will reset after 10 seconds of inactivity...");
}

void loop() {
    Watchdog.enable(10000);
    Serial.println("Running...");
    delay(2000);
}
Output:
Arduino will reset after 10 seconds of inactivity...
Running...
In this example, we include the Adafruit SleepyDog library and initialize the serial communication. In the loop() function, we enable the watchdog timer for 10 seconds. If there is no activity within this time frame, the Arduino will automatically reset. This method is particularly useful for battery-powered projects where power conservation is essential. It allows your Arduino to reset itself after a period of inactivity, ensuring efficient energy usage.
Conclusion
Resetting your Arduino is an essential skill for anyone working with this versatile microcontroller. Whether you choose to use the physical reset button, the SoftwareReset library, or the Adafruit SleepyDog library, each method offers unique advantages suited to different scenarios. Understanding these methods can enhance your workflow and improve your project’s reliability. So, the next time you find yourself needing to reset your Arduino, you’ll be well-equipped with the knowledge to do it effectively. Additionally, if you need to make space or manage installed libraries, you should know How to Delete Arduino Libraries From Arduino IDE.
FAQ
- How do I reset my Arduino without a reset button?
You can use the SoftwareReset library to reset the Arduino programmatically from within your sketch.
-
What is the purpose of the Adafruit SleepyDog library?
The Adafruit SleepyDog library helps manage power consumption and can automatically reset your Arduino after a specified period of inactivity. -
Can I reset the Arduino using a specific pin?
Yes, you can connect a button to a specific pin and programmatically reset the Arduino by manipulating that pin’s state. -
Is there a way to reset the Arduino using a command in the serial monitor?
No, the Arduino cannot be reset directly using a command from the serial monitor. You must use one of the methods mentioned above. -
What should I do if my Arduino becomes unresponsive?
You can try pressing the reset button. If that doesn’t work, consider checking your code for errors or using the SoftwareReset library to reset it programmatically.
