Enviar correo electrónico con formato HTML mediante C#
-
Cree un formulario de Windows para enviar correos electrónicos con formato HTML utilizando
C# -
Escriba el código para enviar correos electrónicos con formato HTML utilizando
C#

Este artículo le enseñará cómo enviar correos electrónicos con formato HTML usando C# en ASP.Net.
El envío de correos electrónicos a través de SMTP se puede probar con su cuenta de Gmail actual o con una cuenta completamente nueva. El cliente Gmail Mailer se puede utilizar para la comunicación.
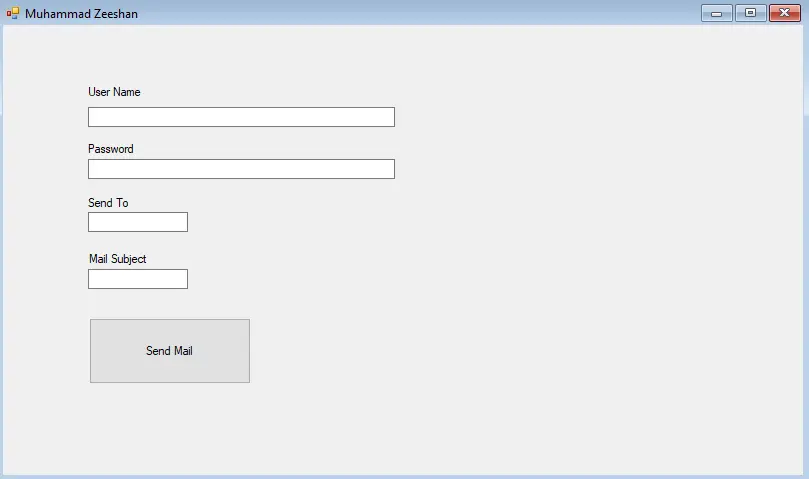
Cree un formulario de Windows para enviar correos electrónicos con formato HTML utilizando C#
-
Agregue una etiqueta y un cuadro de texto para
Nombre de usuario. Este será el nombre de usuario del remitente.
-
Agregue una etiqueta y un cuadro de texto para
Contraseña. Será la contraseña de la cuenta del remitente.
-
Agregue una etiqueta y un cuadro de texto para
Enviar a. Será la dirección de correo del destinatario.
-
Agregue una etiqueta y un cuadro de texto para
Asuntoo título.
-
Por último, crea un botón llamado
Enviar correo.
El formulario completo se verá así:

Escriba el código para enviar correos electrónicos con formato HTML utilizando C#
A continuación se muestran los pasos necesarios para escribir el código para enviar correos electrónicos con formato HTML usando C#:
-
Para comenzar, importe las siguientes bibliotecas:
using System; using System.Collections.Generic; using System.ComponentModel; using System.Data; using System.Drawing; using System.Linq; using System.Text; using System.Threading.Tasks; using System.Windows.Forms; using System.Net.Mail; -
Cree el objeto
MailMessagey el objetoSmtpClient.MailMessage mail = new MailMessage(); SmtpClient smtp = new SmtpClient("smtp.gmail.com"); -
Ahora, asigne valores de propiedades como remitente, receptor, asunto, cuerpo, etc.
mail.To.Add(sendtotxt.Text); mail.Subject = subjecttxt.Text; var htmlbody = "Here your can write your html"; mail.Body = htmlbody; smtp.Port = 587; smtp.Credentials = new System.Net.NetworkCredential(usertxt.Text, passtxt.Text); -
Habilite
SSLy envíe el mensaje.smtp.EnableSsl = true; smtp.Send(mail);
Código fuente completo
using System;
using System.Collections.Generic;
using System.ComponentModel;
using System.Data;
using System.Drawing;
using System.Linq;
using System.Text;
using System.Threading.Tasks;
using System.Windows.Forms;
using System.Net.Mail;
namespace EmailExample {
public partial class Form1 : Form {
public Form1() {
InitializeComponent();
}
private void sendbtn_Click(object sender, EventArgs e) {
try {
MailMessage mail = new MailMessage();
SmtpClient smtp = new SmtpClient("smtp.gmail.com");
mail.From = new MailAddress(usertxt.Text);
mail.To.Add(sendtotxt.Text);
mail.Subject = subjecttxt.Text;
var htmlbody = "Here your can write your html";
mail.Body = htmlbody;
smtp.Port = 587;
smtp.Credentials = new System.Net.NetworkCredential(usertxt.Text, passtxt.Text);
smtp.EnableSsl = true;
smtp.Send(mail);
MessageBox.Show("Mail Sent!");
} catch (Exception ex) {
MessageBox.Show(ex.Message);
}
}
}
}
Producción:

I have been working as a Flutter app developer for a year now. Firebase and SQLite have been crucial in the development of my android apps. I have experience with C#, Windows Form Based C#, C, Java, PHP on WampServer, and HTML/CSS on MYSQL, and I have authored articles on their theory and issue solving. I'm a senior in an undergraduate program for a bachelor's degree in Information Technology.
LinkedIn